
Flakey Butter Parathas
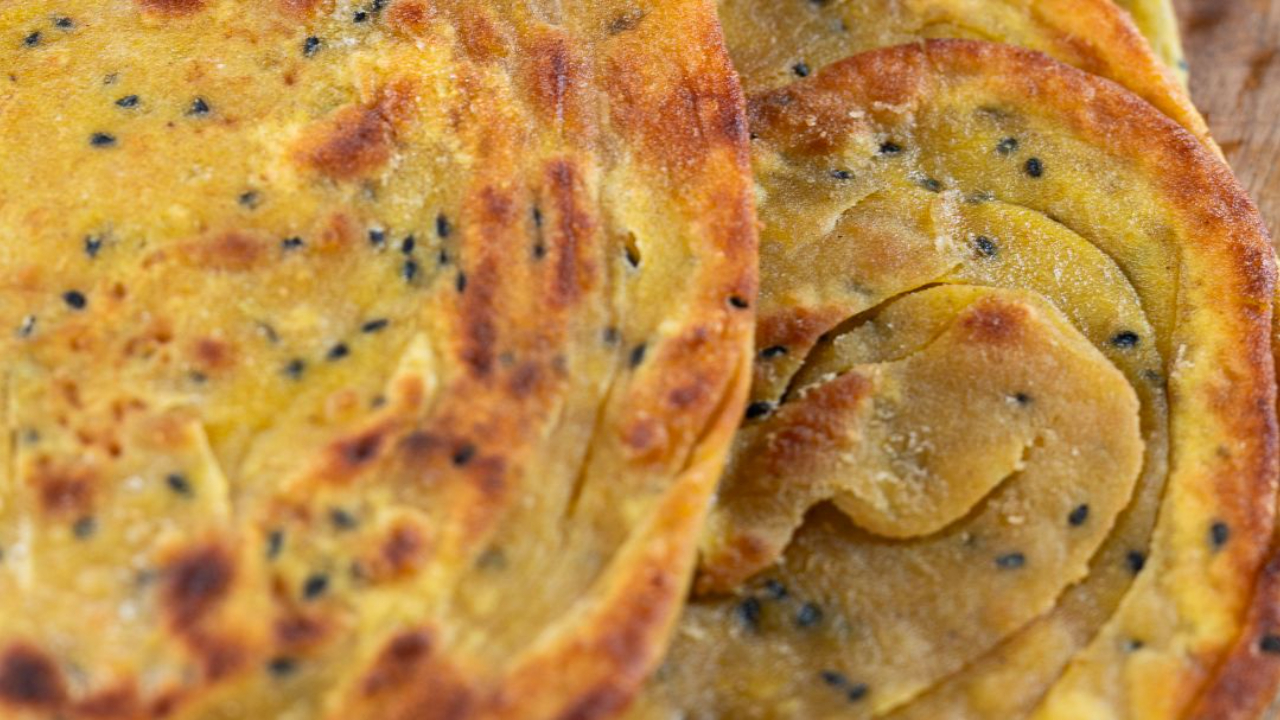
Flakey Butter Parathas
If you've ever eaten a paratha at a restaurant and wondered how on earth it's that flaky, this is the recipe for you. I grew up in the UK where curry is basically a national dish, and it's something I've always absolutely loved to eat. I've never worked in an Indian kitchen, which is honestly one of my great chef regrets, but it's also meant that Indian food is something I teach myself at home, using what I know about technique from years of professional cooking. Parathas were one of those things I was determined to crack. Once I understood the lamination principle, the same logic as puff pastry but much simpler, it all clicked into place. Now it's a technique I genuinely love, and once you've done it a couple of times you'll feel the same way.
Watch me make these on YouTube!
Recipe Details
- Prep Time: 15 minutes
- Rest Time: 15 minutes
- Cook Time: 20 minutes
- Total Time: 50 minutes
- Makes: 6 parathas
- Difficulty: Easy (with one fiddly-but-worth-it step)
The dough is simple. The lamination step (the folding and pinwheel bit) sounds complicated but once you've done it once it makes complete sense. The key to the whole thing is not adding too much water to the dough. You want it firm and pliable, not sticky. I'll walk you through it.
Why You'll Love This Recipe
- That flaky texture comes from the technique, not from any fancy ingredients: flour, water, salt, spices, and a little butter. That's it.
- The spiced dough is a game changer: curry powder, onion seeds, and a touch of turmeric for colour. It tastes like a really good naan but you made it from scratch.
- Impressive if you're cooking for people: these come out of the pan golden and puffed and everyone loses their mind a little bit.
- Naturally vegan if you want: just use vegan butter instead of dairy. Works perfectly.
- A brilliant side for so many things: tarka dal, saag halloumi, any curry, or just eaten warm on their own with a cup of tea.
Ingredients
For the Dough:
- 300g plain flour, plus extra for dusting
- 200ml warm water (you may not use all of it, see Instructions)
- 2 good pinches of fine salt
- 2 teaspoons curry powder (be generous, there's a lot of flour)
- 1 teaspoon nigella seeds (onion seeds)
- 1/4 teaspoon turmeric (for colour)
- Optional: a pinch of garam masala if you have it
Additional:
- Melted butter, for brushing (vegan butter works too)
- Neutral cooking oil, for pan-frying
Instructions
- Mix the dry ingredients: In a large bowl, combine the flour, salt, curry powder, nigella seeds, and turmeric. Mix everything together well so the spices and seeds are evenly distributed through the flour before any liquid goes in.
- Add the water gradually: This is the most important part of the dough. Start with about 100ml of warm water and mix it in with your hand or a dough whisk. Then add water bit by bit, 25 to 50ml at a time, until the dough just comes together. You want a firm, kneadable dough, not a sticky, wet one. Depending on humidity and the type of flour you're using, you may not need the full 200ml. Stop adding water as soon as it holds together.
- Knead the dough: Turn out onto a lightly floured surface and knead for about 10 minutes. The technique: fold the front of the dough over, push down with the heel of your hand, give it a quarter turn, and repeat. You'll feel the texture changing as the gluten develops. It should go from rough and uneven to smooth and springy, bouncing back when you press it. That's when it's ready.
- Rest the dough: Lightly oil the bowl, place the dough inside, and cover with a clean tea towel. Leave to rest for 15 minutes. Don't skip this, it makes the dough much easier to roll.
- Divide and roll: After resting, divide the dough into 6 equal pieces. On a lightly floured surface, roll each piece out as thin as you can get it.
- The lamination step (this is the fiddly bit, but it's where all the magic happens): Brush a thin layer of melted butter over the rolled-out dough. Then concertina-fold the dough: fold it up from bottom to top in overlapping folds, like you're folding a letter. Once you have a long thin strip, roll it up tightly into a pinwheel shape. You now have a small, tight coil of layered dough. This is exactly how you create the flaky layers, the same principle as puff pastry, just much simpler.
- Roll out the pinwheels: Take each pinwheel and roll it out flat again on a lightly floured surface. Roll it thin. Any bit of dough that pokes out at the edges can be tucked underneath. You'll see the layers in the dough as you roll, which is exactly what you want.
- Cook the parathas: Heat a pan over medium heat with a little oil and coat the whole surface. Cook each paratha for 2 to 3 minutes on each side until golden and you can see the layers have set. The first one is always a bit of a trial run while the pan gets to temperature, which is completely normal. Don't have the pan too hot as the butter in the dough will colour quickly before the dough has had a chance to cook through. Medium heat, steady and patient.
- Serve warm: Parathas are best eaten straight from the pan. Stack them and keep them warm in a low oven (100°C) while you cook the rest.
Chef's Tips
Firm dough, not soft dough: If your dough is sticky or wet, your parathas won't be flaky, they'll be dense and hard to roll. Add the water slowly and stop as soon as the dough holds together. You can always add more, you can't take it back.
Warm water helps: It absorbs into the flour slightly better and makes the dough easier to bring together. Not hot, just warm.
Knead properly: Ten minutes feels like a lot but it's what develops the gluten that gives you the right texture. A few minutes in a stand mixer with a dough hook works too, but doing it by hand means you can feel the dough changing and know when it's ready.
The rest is non-negotiable: Rested dough is much easier to roll and much more forgiving. Fifteen minutes is the minimum. If you want to make the dough ahead, you can rest it in the fridge for up to 24 hours.
Roll thin: Thinner parathas cook more evenly, have a better texture, and puff up more beautifully in the pan. If they're thick, the outside will colour before the inside is cooked through.
Medium heat, not high: These have butter in the dough, so they colour fast. Medium heat gives you a golden crust and a cooked-through centre. If the pan starts smoking, it's too hot.
Substitutions & Variations
- Want it plain? Leave out the spices for a more neutral flatbread. Still delicious, just more of a blank canvas.
- Vegan: Use a good vegan butter for brushing and a neutral oil for cooking. Works perfectly.
- Add more spice: Garam masala, cumin seeds, or a pinch of chilli powder all work really well in the dough.
- Stuffed parathas: Before you do the concertina fold, add a thin layer of spiced mashed potato or paneer to the dough. Fold and roll as normal. This is aloo paratha and it's extraordinary.
- Serve as a wrap: Parathas are great as a wrap. Fill with leftover curry, some yoghurt, and fresh coriander.
Storage
Best eaten fresh: Like most flatbreads, parathas are at their absolute best straight off the pan. The texture changes as they cool.
Fridge: Stack cooled parathas with a piece of baking paper between each one and store in an airtight container for up to 2 days. Reheat in a dry pan over medium heat for 1 to 2 minutes each side.
Freeze: Parathas freeze well. Stack with baking paper between each one, wrap tightly, and freeze for up to 2 months. Reheat from frozen in a pan or oven.
Dough: The uncooked dough can be kept in the fridge (wrapped tightly) for up to 24 hours. Bring to room temperature for 15 minutes before rolling.
Frequently Asked Questions
What is the difference between paratha and roti?
Roti is a simple unleavened flatbread made from flour and water, rolled thin and cooked dry on a tawa (flat pan). Paratha uses the same basic dough but includes a lamination step, folding the dough with fat to create layers, which gives it that distinctive flaky, slightly puffed texture. Paratha is richer and more complex in texture.
Why is my paratha not flaky?
Usually one of two things: the dough was too wet and soft (it needs to be firm), or the lamination step wasn't done tightly enough. Make sure your dough is properly firm before you start rolling, fold and roll the pinwheel tightly, and roll out thin.
What flour is best for paratha?
Plain flour (all-purpose) works well for home cooking. Traditionally, atta (wholemeal chapati flour) is used in India for a more authentic flavour and slightly more rustic texture. Both are good.
Can I make the dough ahead of time?
Yes. Make the dough, wrap it tightly, and refrigerate for up to 24 hours. Take it out 15 minutes before you want to roll it so it comes back to room temperature.
Do I have to use butter?
No. Any fat works for the lamination layer. Ghee is traditional and gives a gorgeous flavour. Vegan butter, coconut oil, or even a very thin layer of neutral oil all work.
How thin should I roll the parathas?
As thin as you comfortably can while still keeping them in one piece. Around 2 to 3mm is ideal. The thinner they are, the crispier and more layered the result.
You Might Also Like
Onion and Coriander Chapatis — Another homemade flatbread worth having in your rotation. Simpler than parathas, equally good alongside a curry, and the onion and coriander in the dough are a really lovely combination.
Egg Curry with Fennel and Curry Leaves — A brilliant weeknight curry that's ready quickly and pairs perfectly with fresh parathas. Scoop it up with warm bread and it's a proper meal.
Potato and Tomato Curry (Alur Dom) — A simple, deeply spiced vegetarian curry that was made to be eaten with flatbread. Parathas and alur dom together is a combination I could eat every week.
These parathas are one of those things that feel a bit like a skill once you've made them. The first time you do the pinwheel step it might feel fiddly, but by the second or third one you'll have the rhythm of it and it's actually quite satisfying to make. The result is worth every fold. Make them this weekend alongside a dal or a curry and see what happens.
Enjoy!
Del x
Homemade flakey butter parathas with spiced dough and layered pinwheel technique. Crispy, golden, and absolutely delicious alongside any curry.
Join the Dishes with Del community.
Stay in the loop with new recipes, exciting announcements, anything to keep you away from the washing up!
No spam here. Just tasty recipes!
