
Blue Cheese Biscuits - Perfect for Cheese Boards & Using Leftovers
Blue Cheese Biscuits - Perfect for Cheese Boards & Using Leftovers
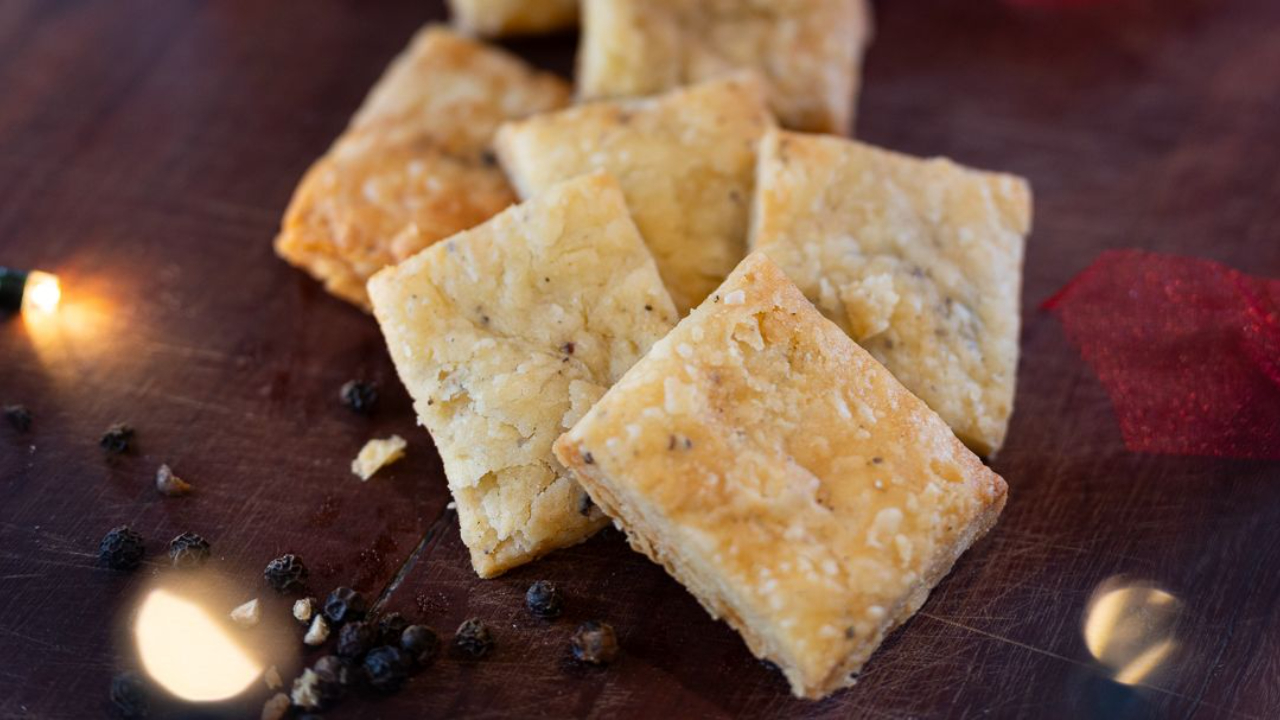
These buttery, crumbly blue cheese biscuits are the most wonderful addition to any cheese board. They're also brilliant for using up those little bits of leftover blue cheese that always seem to linger after entertaining! Short, savoury, and utterly moreish - you won't be able to stop at just one.
Recipe Details:
- Prep Time: 10 minutes (plus 15 minutes chilling)
- Cook Time: 13 minutes
- Total Time: 38 minutes
- Makes: 24 small biscuits (or 12 larger ones if you prefer)
- Difficulty: Easy
- Special Equipment: Rolling pin, cling film
There's something incredibly satisfying about making your own savoury biscuits for a cheese board. These blue cheese biscuits are buttery, short, and absolutely packed with that tangy, salty blue cheese flavour that pairs so beautifully with wine, fresh grapes, and more cheese. The texture is wonderfully crumbly, they just melt in your mouth, and they're incredibly easy to make. The genius thing about this recipe is that it's perfect for using up those leftover bits of blue cheese that always seem to accumulate after a dinner party or cheese board session. You know the ones, those crumbles of Stilton, Roquefort, or Danish Blue that are too good to throw away but not quite enough for anything substantial. This recipe transforms them into something spectacular. The dough comes together quickly, just flour, butter, blue cheese, a touch of nutmeg, and an egg yolk to bind. A quick 15-minute chill in the freezer firms everything up beautifully, then you simply roll out and cut into squares. No fancy shapes required! I love cutting mine into small squares because they look elegant on a cheese board and are the perfect two-bite size. These biscuits are short to eat (meaning they have that lovely crumbly, melt-in-your-mouth texture from all the butter) and so utterly moreish that you'll find yourself reaching for "just one more" over and over again.
Why You'll Love This Recipe
- Perfect for leftovers: The best way to use up those bits of blue cheese after a cheese board
- Simple ingredients: Just flour, butter, blue cheese, egg yolk, and a few seasonings
- Quick to make: Comes together in minutes, ready in under 40 minutes total
- Versatile sizing: Make 24 small elegant biscuits or 12 larger ones
- Utterly moreish: That short, buttery texture means you can't stop at just one!
- Freezer-friendly: Make the dough ahead and freeze for up to 3 months
Ingredients
For the Biscuits:
- 75g plain flour (approximately 2.75 ounces)
- ⅛ teaspoon salt
- Small pinch freshly grated nutmeg (just a few scrapes on a grater)
- A few cracks of cracked black pepper
- 60g cold butter, cubed
- ½ organic egg yolk (or whisk one yolk and use half - save the other half for another use)
- 50g crumbly blue cheese - Stilton, Roquefort, Danish Blue, or any crumbly blue cheese you have
Instructions
1. Make the breadcrumb mixture: Place the flour and cubed cold butter in a large bowl. Using your fingertips, rub the butter into the flour until the mixture resembles fine breadcrumbs. This should take about 2-3 minutes. You can also do this in a food processor if you prefer, just pulse until it looks like breadcrumbs.
2. Add seasonings and cheese: Add the salt, freshly grated nutmeg, and cracked black pepper to the breadcrumb mixture. Crumble in the blue cheese, breaking it up with your fingers as you add it. Mix everything together briefly.
3. Add the egg yolk: Add half an egg yolk. Use a butter knife or your hands to mix everything together until it starts to come together as a dough.
4. Bring the dough together: Once the mixture starts clumping together, use your hands to gather it all up and knead it very briefly, just a few presses, until you have a smooth ball of dough. Don't overwork it or the biscuits will be tough rather than short and crumbly.
5. Wrap and chill: Flatten the dough slightly into a disc shape, wrap it tightly in cling film, and place in the freezer for 15 minutes. This firms up the butter and makes the dough much easier to roll out. You can also chill it in the fridge for 30-45 minutes if you prefer.
6. Preheat the oven: While the dough is chilling, preheat your oven to 200°C (180°C fan/400°F). Line a baking tray with parchment paper or a silicone baking mat.
7. Roll out the dough: Remove the chilled dough from the freezer and unwrap it. Place it on a lightly floured work surface. Roll it out to about 3-4mm thickness (roughly ⅛ inch). Don't roll it too thin or the biscuits will be too crispy and fragile.
8. Cut into squares: Using a sharp knife, cut the rolled dough into 24 small squares (roughly 3cm x 3cm each). You can make them larger if you prefer, just adjust to 12 larger squares. There's no need for fancy cutters or shapes; rustic squares are perfect and very easy.
9. Transfer to baking tray: Carefully transfer the squares to your prepared baking tray, spacing them about 1cm apart. They won't spread much during baking.
10. Bake: Place in the preheated oven and bake for 13 minutes, or until the biscuits are golden brown and smell absolutely delicious. Keep an eye on them toward the end as ovens vary and you don't want them to burn.
11. Cool completely: Remove from the oven and leave the biscuits on the tray for 2-3 minutes to firm up slightly, then transfer to a wire rack to cool completely. They'll crisp up beautifully as they cool.
12. Serve: Arrange on a cheese board alongside your favourite cheeses, grapes, crackers, and accompaniments. Watch them disappear!
Chef's Tips
For the best texture: Keep the butter cold and don't overwork the dough. This keeps the biscuits short (crumbly) rather than tough.
Freezer vs fridge: The 15-minute freezer chill works brilliantly and speeds things up, but if you prefer, you can chill the dough in the fridge for 30-45 minutes instead.
Use any blue cheese: Stilton is classic, but any crumbly blue cheese works beautifully. Roquefort, Gorgonzola, Danish Blue, or even a creamy Cashel Blue all work well.
Fresh nutmeg is key: A tiny amount of freshly grated nutmeg adds incredible depth. Don't worry if you don't have a whole nutmeg just use pre-ground stuff.. Just a few scrapes on a fine grater is all you need.
Perfect for leftovers: This is genuinely the best way to use up those bits of blue cheese that linger after a cheese board. Even if you have multiple types, mix them together!
Don't skip the chilling: The dough needs to be chilled to firm up the butter, making it much easier to roll and cut cleanly.
Substitutions & Variations
Different cheese: While blue cheese is traditional and delicious, you could make these with mature cheddar, aged parmesan, or even a combination of cheeses. The texture and flavour will be different but still delicious.
Add herbs: Stir in a teaspoon of fresh thyme leaves or finely chopped rosemary for extra flavour.
Spice it up: Add a small pinch of cayenne pepper or paprika for a gentle kick of heat.
Walnut version: Add 25g finely chopped toasted walnuts to the dough. Walnuts and blue cheese are a classic pairing.
Seed topping: Before baking, brush the biscuits with a tiny bit of water and sprinkle with sesame seeds, poppy seeds, or nigella seeds.
Make them round: Use a small cookie cutter to cut rounds instead of squares if you prefer a more traditional biscuit shape.
Larger biscuits: Cut into 12 larger rectangles instead of 24 small squares. They'll need an extra 2-3 minutes baking time.
Parmesan version: Replace the blue cheese with finely grated parmesan for a milder flavour that's still absolutely delicious.
Storage & Make Ahead
Storage: Store the baked biscuits in an airtight container at room temperature for up to 1 week. They'll stay crisp and delicious.
Make ahead, unbaked dough: The dough can be made, wrapped in cling film, and refrigerated for up to 3 days before rolling and baking. You can also freeze the wrapped dough for up to 3 months. Thaw overnight in the fridge before rolling out.
Make ahead and cut: Roll out the dough, cut into squares, and place on a parchment-lined tray. Freeze until solid (about 1 hour), then transfer to a freezer bag. Bake from frozen, adding 2-3 extra minutes to the baking time.
Serving Suggestions
On a cheese board: Arrange these biscuits alongside a selection of cheeses (including more blue cheese, of course!), fresh and dried fruits, nuts, chutneys, and honey. They're perfect for entertaining.
With soup: Serve warm alongside a bowl of creamy soup - they're especially good with roasted tomato soup, butternut squash soup, or French onion soup.
As a canapé base: Top each biscuit with a small amount of cream cheese or mascarpone, a slice of pear, and a drizzle of honey for an elegant canapé.
With wine: These pair beautifully with a glass of port, a bold red wine, or even a crisp white wine. The salty blue cheese loves wine!
Gift giving: Package these in a cellophane bag tied with ribbon for a lovely homemade gift. Perfect for cheese lovers!
Afternoon nibbles: Serve with pre-dinner drinks or as an afternoon snack with a cup of tea.
Frequently Asked Questions
Q: Can I use soft blue cheese instead of crumbly? A: Crumbly blue cheese like Stilton works best as it distributes evenly through the dough. Very soft, creamy blue cheese might make the dough too wet and difficult to work with. If your blue cheese is quite soft, reduce the egg yolk slightly.
Q: Why is my dough too crumbly and won't come together? A: Add a tiny drop more egg yolk (literally a few drops) or a teaspoon of very cold water. The amount of moisture in blue cheese can vary, so sometimes you need to adjust slightly.
Q: Can I make these without egg? A: The egg yolk helps bind the dough and adds richness. You could try replacing it with 1-2 teaspoons of very cold water, but the texture won't be quite as short and rich.
Q: My biscuits spread during baking. What went wrong? A: The butter was probably too warm. Make sure the dough is properly chilled before rolling, and work quickly. If your kitchen is very warm, chill the cut biscuits on the tray for 10 minutes before baking.
Q: Can I add more blue cheese? A: You could increase to 60-70g if you love blue cheese, but much more than that and the dough might become too crumbly to work with. The current amount gives a good balance of flavour without overwhelming the biscuit.
Q: What does "short" mean when describing biscuits? A: "Short" refers to the crumbly, melt-in-your-mouth texture that comes from a high ratio of fat (butter) to flour. Short biscuits break cleanly rather than bending, and they have that lovely tender, buttery quality.
You Might Also Like
Gingerbread Spiced Shortbread - Another great recipe for gifting.
Orange Peel Dipped in Chocolate - These are great because not only do they taste great but they to use up something that may have gone in the bin! The orange peel.
Mince Pies - Great for gifting, but are another christmas classic that I just LOVE.
Enjoy!
Del x
These buttery blue cheese biscuits are perfect for cheese boards and brilliant for using up leftover blue cheese. Short, crumbly, and utterly moreish, you won't be able to stop at just one! They're so simple to make and taste absolutely wonderful with wine and cheese.
Join the Dishes with Del community.
Stay in the loop with new recipes, exciting announcements, anything to keep you away from the washing up!
No spam here. Just tasty recipes!
