
Wholemeal Ciabatta Rolls - Healthy Homemade Bread Recipe
Wholemeal Ciabatta Rolls - Healthy Homemade Bread Recipe
These wholemeal ciabatta rolls are a BRILLIANT healthier twist on classic ciabatta! Using a mix of white and wholemeal flour, they're still beautifully light and airy but with a lovely nutty flavour, extra fibre, and more nutrients. The stretch-and-fold method means no kneading required, and they're surprisingly EASY to make with just 10 minutes of active work. They taste absolutely AMAZING - perfect for sandwiches, dipping, or serving alongside meals - and they're SO much better for you than shop-bought white bread!
Recipe Details:
- Active Time: 10 minutes
- Resting Time: 1 hour 50 minutes
- Baking Time: 20-25 minutes
- Total Time: 2 hours 20 minutes
- Makes: 6 ciabatta rolls
- Difficulty: Medium
- Special Equipment: Large bowl, 2 baking trays, tea towel
If you love the idea of fresh, homemade ciabatta but want something a bit healthier and more nutritious, this wholemeal version is PERFECT! By using a combination of white bread flour and wholemeal flour (100g white, 300g wholemeal), you get all the benefits of whole grains - more fibre, more vitamins and minerals, and a lovely earthy, nutty flavour - while still keeping that signature light, airy texture that makes ciabatta so special. The white flour helps maintain the structure and those characteristic irregular holes, while the wholemeal flour adds depth of flavour and nutritional value. What I LOVE about this recipe is that it uses the exact same stretch-and-fold method as classic white ciabatta, so once you've got the technique down, you can make either version whenever you fancy! The dough is quite wet and sticky (just like white ciabatta), which is totally normal and exactly what creates that beautiful open crumb structure. You're only actively working for about 10 minutes total, the rest is hands-off resting time while the gluten develops naturally. These wholemeal rolls are INCREDIBLE for sandwiches because they hold up brilliantly to fillings without going soggy, they're fantastic for dipping in olive oil or soup, and they're absolutely DIVINE served warm with butter. And the best part? You're getting all that delicious flavour AND the health benefits of wholegrain. It's a win-win! Want to compare both versions?
Why You'll Love This Recipe
- Healthier than white: More fibre, vitamins, and minerals from wholemeal flour
- Still light and airy: Not dense like some wholemeal breads - beautifully fluffy!
- Nutty flavour: Lovely earthy taste that's more interesting than plain white
- No kneading required: Stretch-and-fold method is SO easy
- Mostly hands-off: Only 10 minutes active work
- Better than shop-bought: Fresher, tastier, no preservatives or additives!
Ingredients
For the Wholemeal Ciabatta Rolls:
- 100g bread flour (white), plus extra for dusting
- 300g wholemeal flour
- 355ml warm water (32°C / 90°F)
- 9g cooking salt (about 1¾ teaspoons)
- 30ml olive oil (2 tablespoons)
- 5g dry yeast (about 1½ teaspoons)
Instructions
Step 1: Prep and proof the dough
Place the yeast in a large bowl and pour in the warm water. Mix until the yeast is completely dissolved - give it a good stir to make sure there are no lumps. Pour in the olive oil and give it another quick mix. Add both the white bread flour and wholemeal flour along with the salt to the bowl. Using a wooden spoon or your hands, mix everything together until just combined and all the flour is fully hydrated. The dough will be very wet and sticky (wholemeal flour absorbs a lot of water, so this is perfect!). Don't worry about it being smooth at this stage - it'll look rough and shaggy. Cover the bowl with a clean tea towel and let it rest for 30 minutes at room temperature. During this time, the flour fully hydrates and the gluten starts developing naturally.
Step 2: Stretch and fold the dough (Round 1)
After 30 minutes, uncover the dough. Wet one of your hands with water (this is ESSENTIAL to stop the dough sticking to you). Reach under one edge of the dough, stretch it upwards as far as it'll go without tearing, and fold it over the top of itself towards the opposite side. Rotate the bowl 90 degrees and repeat - stretch and fold. Do this 4 times in total until you've folded all four "corners" of the dough over itself. The wholemeal dough will feel slightly different to white dough - a bit more textured - but that's normal! Cover the bowl again with the tea towel and let it rest for 20 minutes.
Step 3: Stretch and fold the dough (Round 2)
Uncover the dough and wet your hand again. Repeat the exact same stretching and folding process - 4 stretches and folds, rotating the bowl each time. You'll notice the dough feels smoother and more elastic now, though still with that lovely wholemeal texture. Cover and rest for another 20 minutes.
Step 4: Stretch and fold the dough (Round 3)
Uncover and repeat the stretching and folding process one more time - 4 stretches and folds with a wet hand, rotating the bowl between each fold. The dough should be noticeably smoother, more elastic, and hold its shape much better. It'll have a beautiful speckled appearance from the wholemeal flour. Cover and rest for 20 minutes.
Step 5: Stretch and fold the dough (Round 4 - Final)
This is your final stretch-and-fold round! Uncover the dough and repeat the process one last time - 4 stretches and folds, wet hand, rotating the bowl. The dough should now be smooth, elastic, and full of air. You can see and feel how much it's developed compared to when you first mixed it! Cover and let it rest for a final 20 minutes.
Step 6: Preheat and prepare
While the dough is doing its final rest, preheat your oven to 220°C (428°F). Wholemeal bread benefits from a really hot oven, so make sure it's fully preheated. Line 2 large baking trays with baking paper and set them aside ready.
Step 7: Shape and proof
After the final 20-minute rest, turn the dough out onto a lightly floured work surface. The dough will be soft, puffy, and gorgeous - handle it GENTLY to preserve all those lovely air bubbles you've created! Using your hands or a dough scraper, gently stretch the dough to an even thickness - you're aiming for a rough rectangle shape. Lightly dust the top of the dough with a bit more flour (either white or wholemeal, doesn't matter). Using a sharp knife or dough scraper, cut the dough into 6 equal rectangular portions. Carefully transfer each portion to your prepared baking trays, spacing them well apart because they will spread as they proof and bake. Aim for 3 rolls per tray. Cover the trays loosely with a clean tea towel and let the rolls proof for 30 minutes. They should puff up and look airy.
Step 8: Bake
After proofing, uncover the rolls. If you like, sprinkle a tiny bit of sea salt over the tops for extra flavour and a lovely crunchy finish. Place both trays in the preheated oven (you may need to bake in batches if they don't both fit). Bake for 20-25 minutes until the rolls are beautifully golden brown on top and sound hollow when you tap them on the bottom. They'll be slightly darker than white ciabatta because of the wholemeal flour, but that's perfect! They should have risen nicely and developed a lovely crispy crust. Also you may want to rotate half way through.
Step 9: Cool
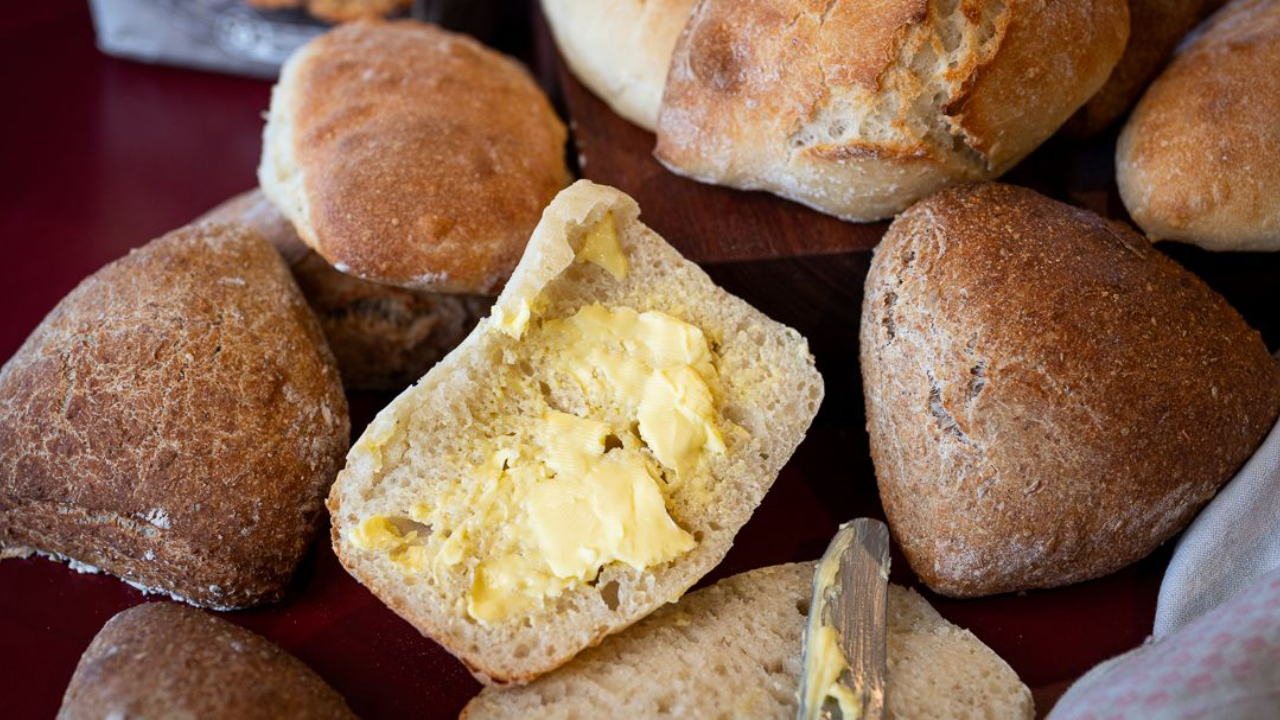
Remove the rolls from the oven and transfer them immediately to a wire cooling rack. Let them cool COMPLETELY before slicing - this is really important! Wholemeal bread especially needs this cooling time for the interior structure to set properly. If you cut into them while warm, they'll be gummy. Once cool, slice and enjoy that beautiful nutty flavour and lovely open crumb!
Chef's Tips
Water temperature matters: 32°C/90°F is ideal - warm to the touch but not hot. This activates the yeast perfectly.
Wholemeal absorbs more water: Don't worry if the dough seems very wet initially - wholemeal flour absorbs a lot of liquid during the rests.
Always wet your hands: Before every stretch-and-fold, wet your hands thoroughly. This stops the sticky dough from clinging to you.
Be gentle when handling: Don't knock the air out! The air bubbles are what create that light, airy texture.
Give them space: These rolls spread and rise, so space them well apart on the trays - about 10cm between each roll.
Hot oven essential: 220°C fully preheated is crucial for good oven spring and a crispy crust.
Add steam: Place a small tray of water on the bottom shelf while baking for an even crispier crust.
Darker colour is normal: Wholemeal bread bakes darker than white bread - don't worry, it's not burnt!
Cool completely: This is especially important for wholemeal - the texture is SO much better when fully cooled.
Substitutions & Variations
Different wholemeal ratio: You can adjust the white-to-wholemeal ratio. Try 200g white + 250g wholemeal for a lighter version.
All wholemeal: For 100% wholemeal, use 400g wholemeal flour. They'll be denser but still delicious and even healthier!
Spelt flour: Replace the wholemeal flour with spelt flour for a different nutty flavour.
Seeded wholemeal: Add 50g mixed seeds (sunflower, pumpkin, sesame, flax) for extra crunch and nutrition.
Honey wholemeal: Add 1 tablespoon honey to the initial mix for a subtle sweetness.
Herb wholemeal: Mix in 2 tablespoons dried herbs (rosemary, oregano, or mixed herbs).
Oat-topped: Brush the tops with water and sprinkle with oats before baking for a lovely finish.
White ciabatta version: Replace all the wholemeal with white bread flour for classic ciabatta (see my white ciabatta roll recipe!).
Health Benefits of Wholemeal
More fibre: Wholemeal flour contains all parts of the grain, giving you significantly more dietary fibre than white flour. This helps with digestion and keeps you fuller for longer.
Vitamins and minerals: Wholemeal flour is rich in B vitamins, iron, magnesium, and zinc - nutrients that are stripped away when making white flour.
Lower GI: Wholemeal has a lower glycemic index than white flour, meaning it releases energy more slowly and helps maintain stable blood sugar levels.
Better for gut health: The fibre in wholemeal flour supports healthy gut bacteria.
More protein: Wholemeal flour contains more protein than white flour.
Antioxidants: The bran and germ in wholemeal flour contain beneficial antioxidants.
Storage & Reheating
Best served fresh: These wholemeal rolls are at their absolute best on the day they're baked - still warm with a crispy crust!
Room temperature storage: Store in a paper bag or bread box (NOT plastic - it makes the crust soggy!) for up to 2-3 days. Wholemeal bread actually keeps slightly better than white.
Refresh the crust: Day-old rolls can be refreshed brilliantly! Sprinkle with a little water and pop in a hot oven (200°C) for 5 minutes. The crust will crisp up beautifully.
Freezing: Freeze completely cooled rolls in a sealed freezer bag for up to 3 months. They freeze absolutely brilliantly!
Defrosting: Defrost at room temperature for 1-2 hours, then refresh in a hot oven for 5 minutes to crisp the crust.
Toast them: Wholemeal ciabatta makes INCREDIBLE toast - slice and toast until golden and crispy. Perfect for breakfast!
Make ahead dough: Make the dough, complete all the stretch-and-folds, then cover and refrigerate overnight. Let it come to room temperature (about 1 hour) before shaping and baking.
Frequently Asked Questions
Q: Can I use all wholemeal flour instead of the mix? A: Yes! Use 400g wholemeal flour for 100% wholemeal rolls. They'll be denser but still delicious and even healthier. You might need to add a tiny bit more water.
Q: Why use a mix of white and wholemeal flour? A: The white flour helps maintain the light, airy texture and open crumb structure, while the wholemeal adds flavour and nutrition. It's the best of both worlds!
Q: My dough is very wet. Is this normal? A: Yes! Wholemeal flour absorbs a lot of water during the resting periods. The dough should be wet and sticky - this creates the lovely texture.
Q: Can I use wholemeal bread flour? A: Absolutely! Wholemeal bread flour (if you can find it) has higher protein and creates an even better texture.
Q: Are these healthier than white ciabatta? A: Yes! They have more fibre, vitamins, minerals, and a lower glycemic index than white ciabatta, plus they keep you fuller for longer.
Q: Will these be as light as white ciabatta? A: They're still beautifully light and airy, but with a bit more substance from the wholemeal flour. They're not dense like some wholemeal breads!
Q: Can I add seeds or grains? A: Yes! Add 50g mixed seeds, oats, or other grains during the initial mixing for extra texture and nutrition.
Q: Why are my rolls darker than the photos? A: Wholemeal flour naturally bakes darker than white flour. As long as they're not burnt (no black bits), they're perfect!
You Might Also Like
White Ciabatta Rolls - The classic version using all white flour - equally delicious!
Homemade Healthy Seed Crackers - Another wholesome homemade bread option packed with nutrition.
2-Ingredient Yoghurt Flatbreads - Quick and easy homemade flatbreads ready in 20 minutes!
Enjoy!
Del x
These wholemeal ciabatta rolls are absolutely BRILLIANT! Healthier than white ciabatta but still beautifully light, airy, and fluffy. The nutty flavour from wholemeal flour is delicious, and you're getting all the benefits of whole grains. Perfect for sandwiches, dipping, or serving warm with butter!
Join the Dishes with Del community.
Stay in the loop with new recipes, exciting announcements, anything to keep you away from the washing up!
No spam here. Just tasty recipes!

